
Vue之axios详解

为什么选择axios?
🔷 功能特点:
🔹在浏览器中发送 XMLHttpRequests 请求
🔹在 node.js 中发送 http请求
🔹支持 Promise API
🔹拦截请求和响应
🔹转换请求和响应数据
axios 的请求方式
🔷 支持多种请求方式:
🔹 axios(config)
🔹 axios.request(config)
🔹 axios.get(url[, config])
🔹 axios.delete(url[, config])
🔹 axios.head(url[, config])
🔹 axios.post(url[, data[, config]])
🔹 axios.put(url[, data[, config]])
🔹 axios.patch(url[, data[, config]])
axios 发送基本请求
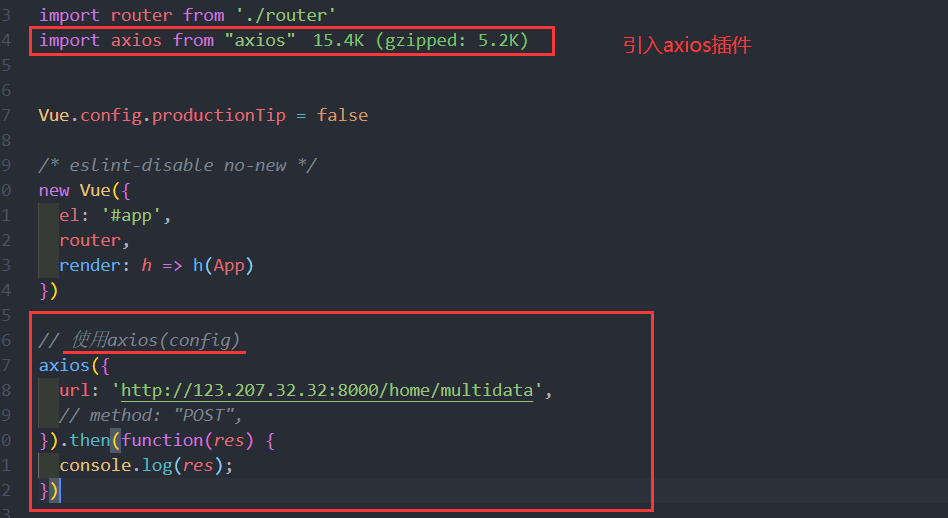

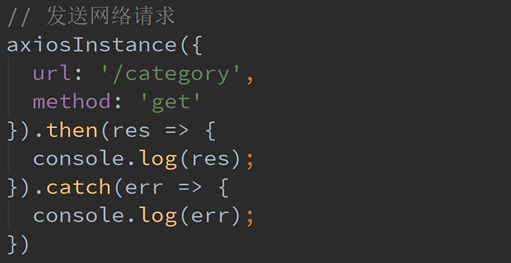
这里我们使用了axios(config) 的请求方式。
config是一个对象,它默认是采用 GET 请求的,当然如果想要使用POST请求,可以添加 method:“POST”
axios 它返回的是一个Promise对象,可以直接在后面使用then catch等方法。
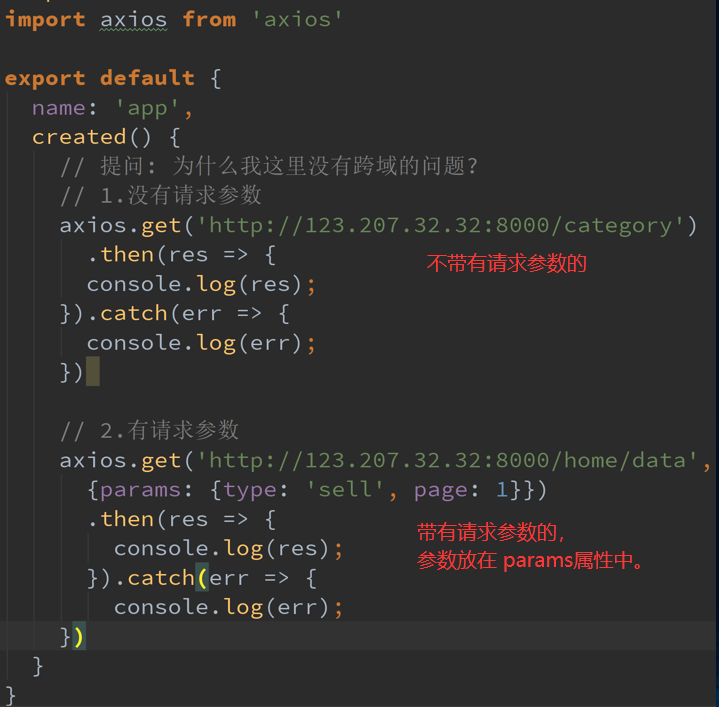
使用 axios.get(url[, config]) 发送请求演示。
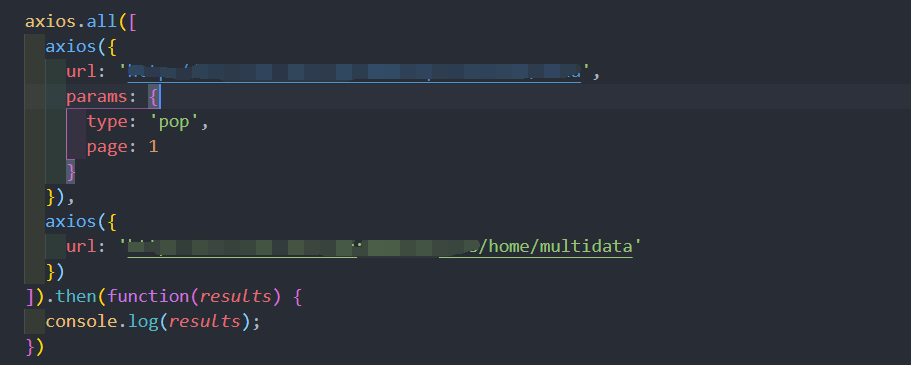
发送并发请求
有时候, 我们可能需求同时发送两个请求
使用axios.all, 可以放入多个请求的数组.
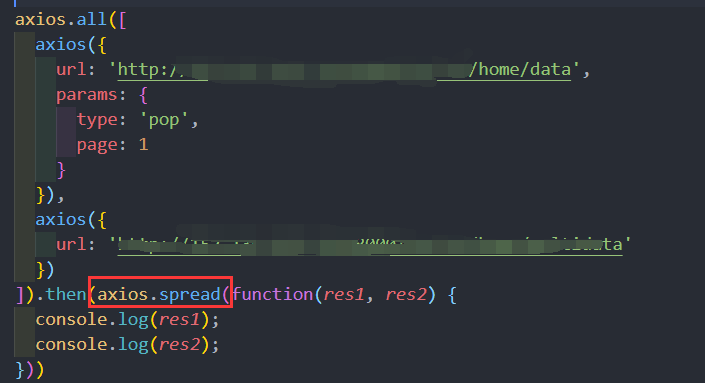
axios.all([]) 返回的结果是一个数组,使用 axios.spread 可将数组 [res1,res2] 展开为 res1, res2
使用axios.all()
使用格式: axios.all([axios(config),axios(config)])

使用 axios.spread 可将数组 [res1,res2] 展开为 res1, res2
使用格式: axios.all([axios(config),axios(config)]).then(axios.spread())

全局配置
🔷在上面的示例中, 我们的BaseURL是固定的
🔹 事实上, 在开发中可能很多参数都是固定的。
🔹 这个时候我们可以进行一些抽取, 将一些公共的配置抽取出来,也可以利用axiox的全局配置。
axios.defaults

常用的配置选项
🔷请求类型
🔹 method: ‘get’,
🔷URL查询对象
🔹 params:{ id: 12 },
🔷请求类型
🔹 method: ‘post’,
🔷request body
🔹 data: { key: ‘aa’},
我们需要注意的是,如果请求类型的get,则后面添加的请求参数应该使用的是 params{ } 。如果请求类型的post,则后面添加的请求参数应该使用的是 data{ } 。
🔷请求地址
🔹 url: ‘/user’,
🔷请根路径
🔹 baseURL: ‘http://www.mt.com/api‘,
🔷超时设置s
🔹 timeout: 1000,
🔷请求前的数据处理
🔹 transformRequest:[function(data){}],
🔷请求后的数据处理
🔹 transformResponse: [function(data){}],
🔷自定义的请求头
🔹 headers:{‘x-Requested-With’:’XMLHttpRequest’},
🔷查询对象序列化函数
🔹 paramsSerializer: function(params){ }
🔷跨域是否带Token
🔹 withCredentials: false,
🔷自定义请求处理
🔹 adapter: function(resolve, reject, config){},
🔷身份验证信息
🔹 auth: { uname: ‘’, pwd: ‘12’},
🔷响应的数据格式 json / blob /document /arraybuffer / text / stream
🔹 responseType: ‘json’,
axios 实例
🔷 为什么要创建axios的实例呢?
🔹 当我们从axios模块中导入对象时, 使用的实例是默认的实例.
🔹 当给该实例设置一些默认配置时, 这些配置就被固定下来了.
🔹 但是后续开发中, 某些配置可能会不太一样.
🔹 比如某些请求需要使用特定的baseURL或者timeout或者content-Type等.
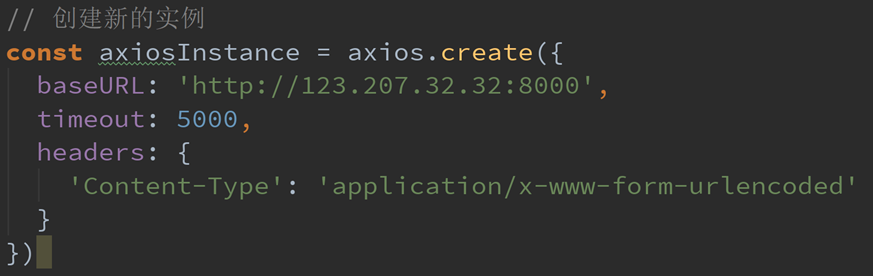
🔹 这个时候, 我们就可以创建新的实例, 并且传入属于该实例的配置信息.
所以当我们的业务比较多的时候,请求接口比较多,我们使用上面的全局配置就不行了。这个时候我们就要使用axios实例了。
网络请求模块的封装
我们为什么要axios进行封装?
如果我们使用的 axios 有一天不进行了维护,或者出现重大的bug ,我们需要换其他的第三方网络请求框架。那么我们需要在每一个组件中都需要修改,很是不好。所以我们对网络请求模块进行封装,即使有一个我们需要改换其他的第三方网络请求框架,就只对我们的网络请求模块进去修改即可。
创建一个network文件夹。这里面放对网络封装相关的文件。
创建request.js
封装一:
使用回调函数。
request.js
1 | import axios from 'axios' |
使用模块:
1 | import { request } from "./newwork/request" |
封装二:
使用回调函数。
request.js
1 | import axios from 'axios' |
使用模块:
1 | import axios from 'axios' |
封装三:
使用Promise。
request.js
1 | import axios from 'axios' |
使用模块:
1 | import { request } from "./newwork/request" |
封装四:(最终方案)
使用Promise。
request.js
1 | import axios from 'axios' |
使用模块:
1 | import { request } from "./newwork/request" |
axios 拦截器的使用
axios提供了拦截器,用于我们在发送每次请求或者得到相应后,进行对应的处理。
axios 请求拦截器
🔷 为什么要拦截请求呐。
🔹 我们对请求的config进行一些修改。
🔹 比如config中的一些信息不符合服务器的要求。
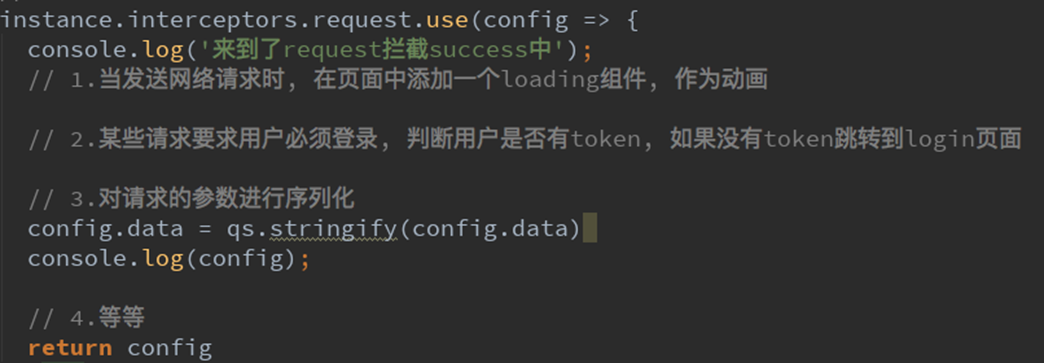
🔹 比如每次发送网络请求的时候,都希望在界面中显示一个请求的图标。
🔹 比如某些网络请求(比如 登陆(携带token)),必须携带一些特殊的信息。
instance.interceptors.request.use(参数一,参数二) 传入两个参数,拦截请求成功函数,和拦截请求失败函数。
注意:我们拦截之后,对请求做完一系列修改,我们要返回请求,不然后面我们请求不到数据。

🔷 请求拦截可以做到的事情:
🔹 请求拦截中错误拦截较少,通常都是配置相关的拦截。
🔹 可能的拦截的错误:比如请求超时,可以将页面跳转到一个错误页面中。
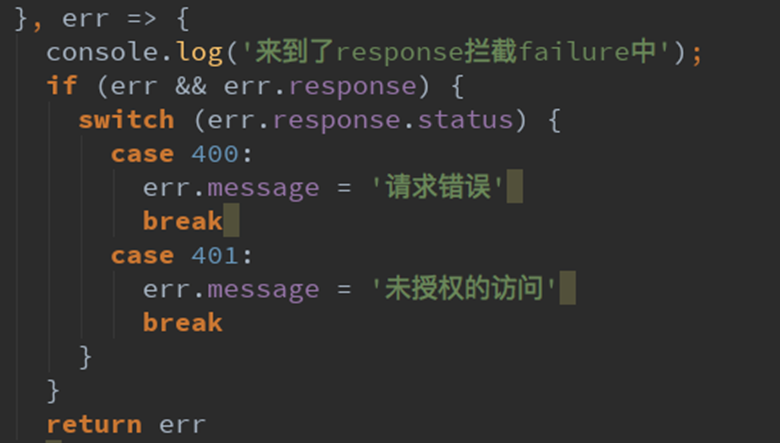
axios 响应拦截器
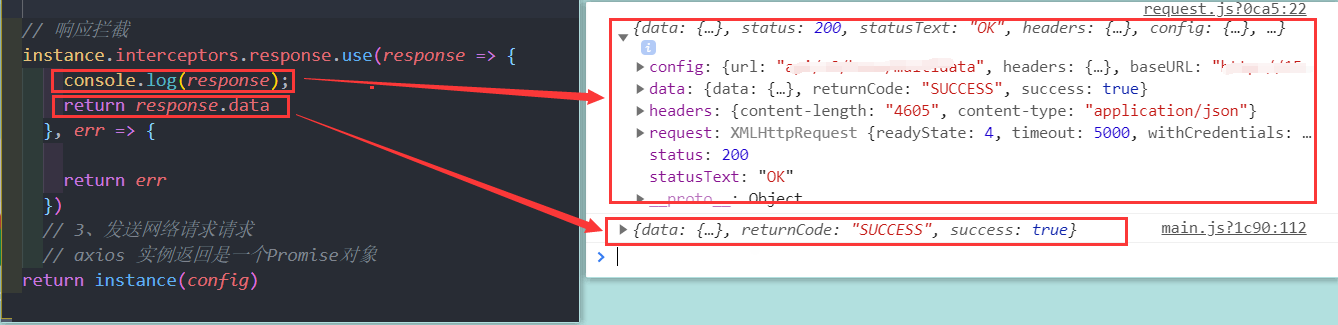
instance.interceptors.response.use() 响应拦截也是两个参数。拦截响应成功函数,和拦截响应失败函数。
同样我们拦截到响应之后,要返回响应,通常返回return response.data 即可,因为我们只要数据。
🔷 响应拦截中完成的事情:
🔹 响应的成功拦截中,主要是对数据进行过滤。


🔹 响应的失败拦截中,可以根据status判断报错的错误码,跳转到不同的错误提示页面。
request.js
1 | import axios from 'axios' |

Use this card to join the candyhome and participate in a pleasant discussion together .
Welcome to aqing's candyhome,wish you a nice day .
.jpg)